How to Use Apple Pay on Vending Machine? Step-by-Step Guide
With almost 50% of the population in the United States using Apple’s iPhone and iPhone being the 3rd top smartphone vendor globally, it makes sense that Apple Pay is one of the main mobile payment apps to be supported on vending machines.
Vending machines that support Apple Pay will have an NFC logo on their card reader.
So, If you’re wondering how to use Apple Pay on vending machines, then you’ve come to the right place!
To Use Apple Pay on Vending Machine – Hit “start” on the machine’s card reader, open the Apple Pay app. Provide your Touch ID and hold your Apple device in front of the card reader over the NFC logo. Once the card reader displays an authorization message, choose a product and hit “ok” to dispense.
In this article, we’re taking a closer look at how paying with Apple Pay works and how you can do it the next time you’re visiting your favorite vending machine.
RELATED READ: Does Samsung Pay Work on Vending Machines? Is It Safe?
How to Use Apple Pay on a Vending Machine?
The following are all the required steps to use Apple Pay on a vending machine, from setting up an account to providing a Touch ID.
Step 1: Set up an Apple Pay Account
First, you need to open the Apple Pay app on your Apple device and add your card. Whether you’re using an iPhone, an iPad, or an Apple Watch, you’ll find the app already installed on your device so you don’t need to look for it on the App Store.
- Once you open the Apple Pay app, you should see a “+” on the top right corner of the screen.
- Tap the “+”.
- You’ll be prompted to scan your credit or debit card using your device’s camera by positioning the card properly inside the on-screen frame.
- Alternatively, you can choose to add your card information manually by tapping the “Enter Card Details Manually” option.
- After that, follow your bank directions regarding any authorization codes.
With your credit or debit card added to the Wallet app on your Apple device, you’re ready to go!
Step 2: Make Sure the Vending Machine Supports Apple Pay
Next, you need to make sure the vending machine that you want to buy from supports Apple Pay. You can easily do this by checking whether or not the card reader on the machine has an NFC logo on it.
NFC, or near field communication, is the technology that enables vending machines to accept mobile payments. NFC technology works similarly to card payments except for the physical differences.
In card payments, your information is stored within the particles of the magnetic stripe on the back of your card. When you swipe your credit or debit card through the machine’s card reader, the machine picks up the information and sends it to the respective banks for further processes.
In NFC mobile payments, your information is kept in digital form on your smart device. When you hold it over the NFC logo, the information is picked up and sent to the respective banks via NFC.
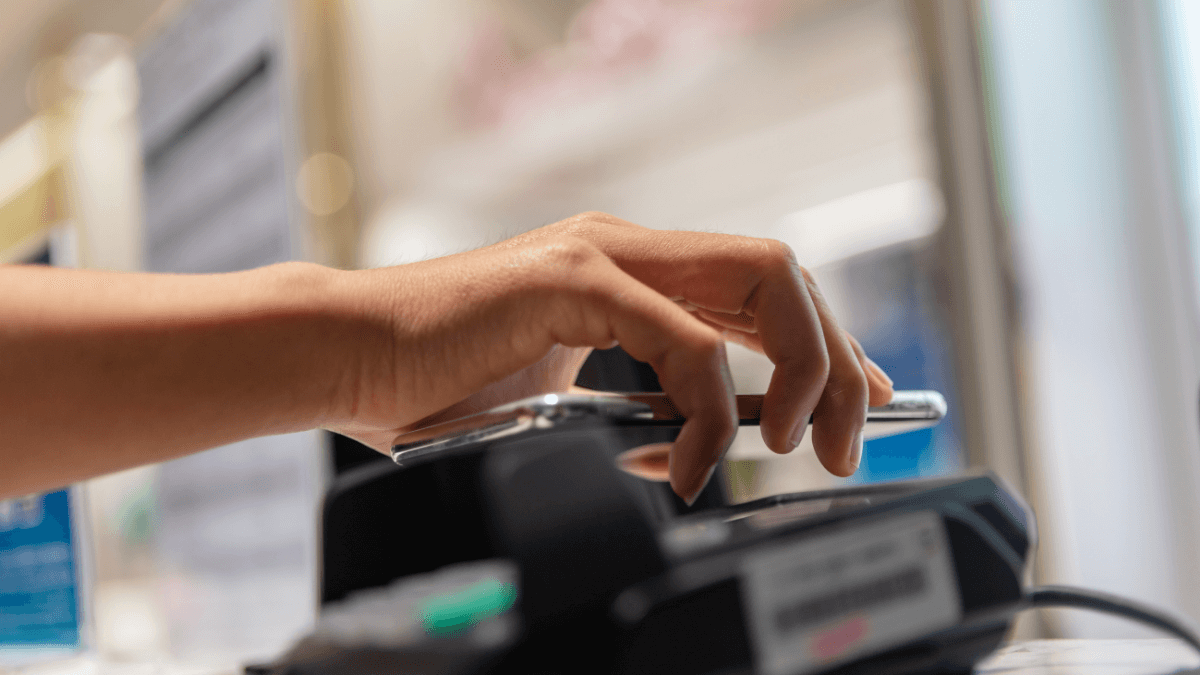
Step 3: Use Your Apple Device to Pay
Once you’re finished setting up your Apple Pay account and you’ve found a vending machine that supports Apple Pay, follow the steps below to make a purchase:
- Hit “start” on the card reader.
- Open the Apple Pay app on your Apple device.
- Hold your Apple device close to the card reader over the NFC logo.
- A prompt to provide your Touch ID should be visible on your device’s screen.
- Use your finger to enable it while holding the device over the NGC logo.
- The card reader should display an authorization message.
- Choose your product(s).
- Hit “ok” or the corresponding accept button.
- The product(s) will be dispensed.
What to Do If Something Goes Wrong with the Apple Payment?
Using Apple Pay to buy from a vending machine is incredibly easy. But what if something goes wrong and the payment doesn’t go through? Or what if you look at the transaction after you’re done and find that you got overcharged?
No need to panic! Here’s what you can do to fix such issues:
- If the payment doesn’t go through — this could be because you didn’t position your Apple device properly over the NFC logo. Make sure the device is close enough and try wiggling it a bit to ensure that the reader detects it.
- If the payment doesn’t go through — this could be due to an issue with the card linked to the account. In this case, contacting your bank is the best solution to clear things up.
- If you got overcharged — although not very common, this could happen when using mobile payments. The best solution is to contact your bank first and make sure the extra amount isn’t just a “transaction hold”. If it is, the extra amount will be added back to your account once the hold period is over.
If it’s not, contact the customer service number labeled on the vending machine and request a refund. You’ll be asked to provide some details regarding the location of the machine and the transaction process, but you should find no trouble getting your refund.
Wrap Up
Once upon a time, cash was the only acceptable form of payment if you wanted to buy from a vending machine. But since their first appearance back in the 1980s, vending machines have come a long way when it came to supporting payment methods.
Nowadays, not only can you use your credit or debit card to purchase from vending machines, but more and more of them are starting to support mobile payment as well.
There you have it, a complete guide on how to use Apple Pay on vending machines. All you need to do is set up an Apple Pay account and find a vending machine that supports mobile payment.
From there, the process is as easy as hovering your Apple device over the NFC logo on the machine’s reader while providing your Touch ID. Once the card reader displays an authorization message, choose a product and it’ll be dispensed after your hit “ok”.